Trim/Extend to Corner
Two clicks, one corner. Click two lines — or two walls, drawn with whatever extension you like — on the side you want to keep, and both are trimmed or extended until they meet.
If you have used Revit, it is TR — Trim/Extend to Corner — working on SketchUp geometry.
| Works on | |
|---|---|
| Lines | Loose edges that bound no face, including a run of several edges in one line |
| Walls from other extensions | Muzwalls, Medeek and FlexTools walls, or layers you grouped by hand — cut on one mitre, whatever their layers |
| Solid groups | A single solid, read as a wall of one layer |
| Any pair of these | A line against a layered wall works the same as two lines |
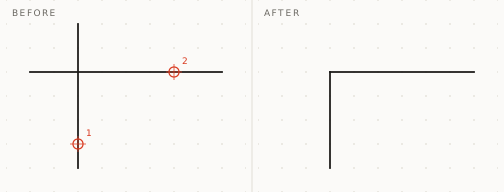
Two lines that run past each other
The commonest corner in a sketch: two lines drawn quickly, both overshooting. Click each on the part you want to keep, and the overshoot goes.
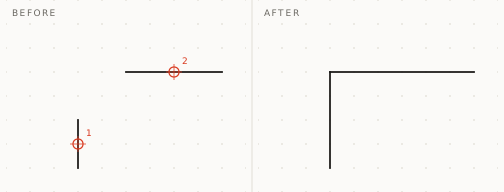
Two lines that fall short
The same two clicks extend instead of trimming. Neither line has to reach the other first — the corner is where they would meet.
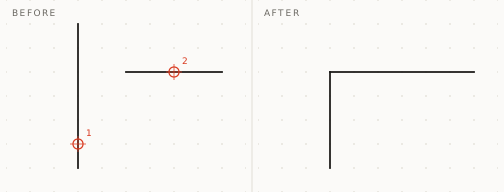
One too long, one too short
Each line is resolved on its own: one is trimmed, the other extended, in one operation and one undo step.
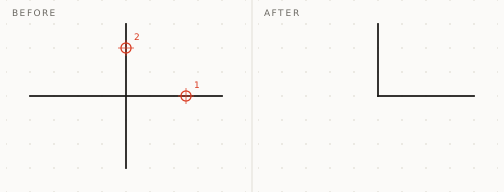
Where you click is what you keep
Two crossing lines make four possible corners. There is no dialogue asking which one you meant: the side you click on is the side that stays.
Walls from another extension
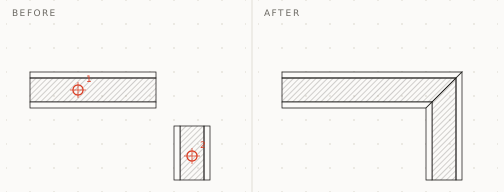
Two layered walls — drawn with Muzwalls, Medeek, FlexTools or grouped by hand — meet on one mitre. It runs from where their inside faces cross to where their outside faces cross, and every layer of both walls is cut on it. Walls with the same build-up meet layer for layer; walls with different ones still close cleanly on both faces.
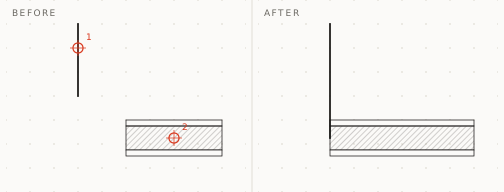
A line against a wall
Any of these pairs with any other. A loose line and a layered wall meet at a corner the same way two lines do. The line stops on the wall's centre line.
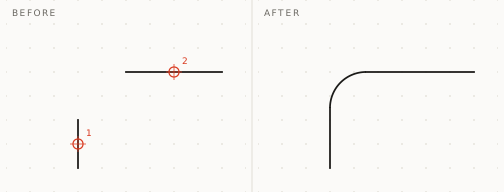
A rounded corner between two lines
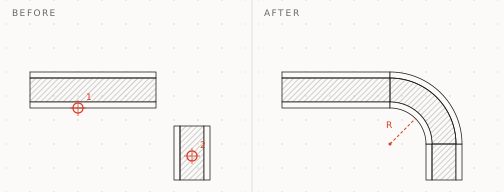
Type a radius before you click, and the two lines meet on an arc instead of at a point. Each is trimmed or extended to where the arc touches it, and the arc is an ordinary SketchUp arc: Entity Info shows its radius and segments.
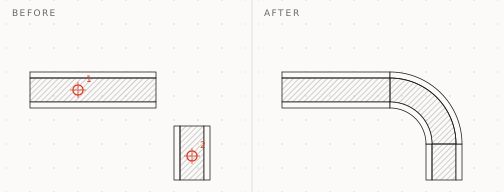
A rounded corner between two walls
Two layered walls with the same build-up bend round one centre, every layer on its own radius. The arc is a group of its own between them, so both walls stay straight and can still be trimmed and merged later. Walls with different build-ups, or a line and a wall, still meet — on a sharp corner, and the status bar says why.
The face you click is the one the radius is measured on
A radius on a thick wall depends on where it is measured. Click the first wall on its inside face and the radius is the inside face's; on its outside face, the outside's. Ctrl (Option on a Mac) steps through the inside face, the faces between layers, the centre line and the outside face before the second click, and Left and Right do the same after it.
When there is no corner, it says so
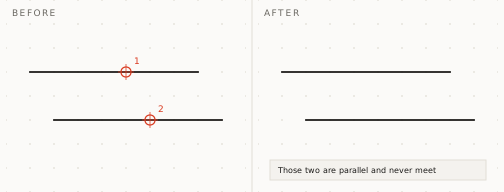
Two parallel lines never meet, two lines in one line have no corner between them, and a sloping line is not in plan. Trim/Extend to Corner leaves the model alone and tells you why in the status bar, rather than doing something you did not ask for.
How it is used
| Input | What it does |
|---|---|
| Click | The first line or wall, on the side to keep |
| Click | The second — both move to the corner |
| Type a length | The radius — 0 for a sharp corner. Before the clicks it is used for every corner; after one, it re-tunes that corner |
| Type 24s | The number of segments in the arc |
| Ctrl (Option on a Mac) | Steps the face the radius is measured on |
| Left, Right | The same, once the corner is made |
| Esc | Forgets the first pick |
| Undo | Takes back the whole corner in one step, however often it was re-tuned |


For SketchUp on Windows and macOS.
An early build, so expect rough edges.